Keep it Cool
This lesson explores how engineers have met the challenge of keeping foods, liquids, and other items cool. Students learn about heat transfer, vacuums, and insulation and design a system to keep a cup of chilled water as cool as possible for one hour.
- Learn about insulation, heat transfer, and vacuums.
- Learn about engineering design and redesign.
- Learn how engineering can help solve society’s challenges.
- Learn about teamwork and problem solving.
Age Levels: 8-18
Build Materials (For each team)
Required Materials
- Paper cups
- Thermometer
- Aluminum foil
- Plastic sheets
- Fabric
- Cotton balls
- Moss
- Cardboard
- Straws
- Paper clips
- Binder clips
- Clothes pins
- Wire
- String
- Recycled packing foam
- Rubber bands
Testing Materials
- Water
- Ice
- Larger pitcher
Materials
- Water
- Ice
- Larger pitcher
Process
Chill water in a large pitcher with ice and take a temperature reading from the pitcher. Test each team’s insulation system by pouring an equal amount of chilled water (without ice) into each team’s cup. Next, teams measure the temperature of their chilled water every 10 minutes for 1 hour and chart their results.
Design Challenge
You are part of a team of engineers given the challenge of building an insulation system using a container to keep a cup of chilled water from warming up. Your team’s challenge is to develop a device to keep chilled water cooler than other team’s devices at the end of one hour. You will need to devise a way to have a thermometer suspended in the water and be able to read the temperature throughout the hour.
Criteria
- Must keep the water cooler over the course of an hour.
- Must be a way for a thermometer to be suspended in the water.
- Temperature readings to be taken every 10 minutes for 1 hour.
Constraints
- Temperature readings to be taken every 10 minutes for 1 hour.
- Break class into teams of 2-3.
- Hand out the Keep it Cool worksheet, as well as some sheets of paper for sketching designs.
- Discuss the topics in the Background Concepts Section. Consider asking students how a thermos helps to keep their lunch hot.
- Review the Engineering Design Process, Design Challenge, Criteria, Constraints and Materials.
- Instruct students to start brainstorming and sketching their designs.
- Provide each team with their materials.
- Explain that students must design and build an insulation system using a cup that will keep water as cold as possible for 1 hour. The design must allow for a thermometer to be suspended in a cup with the temperature visible. Teams will be taking temperature readings every 10 minutes for 1 hour.
- Announce the amount of time they have to design and build (1 hour recommended).
- Use a timer or an on-line stopwatch (count down feature) to ensure you keep on time. (www.online-stopwatch.com/full-screen-stopwatch). Give students regular “time checks” so they stay on task. If they are struggling, ask questions that will lead them to a solution quicker.
- Students meet and develop a plan for their insulation system They agree on materials they will need, write/draw their plan, and present their plan to the class. Teams may trade unlimited materials with other teams to develop their ideal parts list.
- Teams build their designs.
- Instruct students to take temperature readings every 10 minutes for 1 hour. Next, they should chart their readings.
- As a class, discuss the student reflection questions.
- For more content on the topic, see the “Digging Deeper” section.
Student Reflection (engineering notebook)
- How similar was your original design to the actual insulated cup that you built? What changed? Why?
- How did your team’s temperature variance compare with the rest of the class?
- If you had a chance to do this project again, what would your team have done differently?
- What did your graph tell you about the rate of temperature changer for your device?
- If you could have used one additional component material that was not provided to you which would you choose and why?
- Did your team make use of any of the things you learned about vacuum flasks in your design? If so, how, and did you think it made a difference?
- What aspects of other team designs did you find most innovative? Why?
Time Modification
The lesson can be done in as little as 1 class period for older students. However, to help students from feeling rushed and to ensure student success (especially for younger students), split the lesson into two periods giving students more time to brainstorm, test ideas and finalize their design. Conduct the testing and debrief in the next class period.
Insulation, Heat Transfer and Vacuums

Insulation and Vacuums
Insulation is used for many purposes. Insulation is needed to protect fragile items from being damaged during shipping. It is used to keep cold air out of houses in the wintertime, it is used to separate electric wires, and it is used to keep cool items cool and hot items hot in a vacuum flask. Many materials are used as insulation from fabric to moss to plastic to fiberglass to animal skins. In the case of a vacuum flask, a vacuum serves as the insulation. A vacuum is created when a volume of space is essentially empty of matter; usually when air is pumped out. Light bulbs contain a partial vacuum, usually backfilled with argon, which protects the tungsten filament.
Heat Transfer
Heat can transfer in three ways: conduction, convection, and radiation. Conduction is the transfer of heat by direct contact of particles of matter. Metals such as copper, platinum, gold, and iron are usually the best conductors of thermal energy. Convection is the transfer of thermal energy due to the movement of molecules within fluids. Radiation is the transfer of heat energy through empty space.
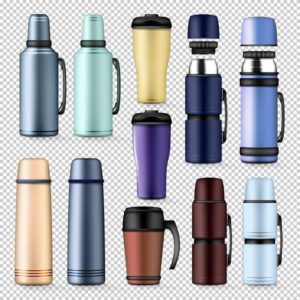
Vacuum Flasks
Invented in 1892 by Sir James Dewar, a scientist at Oxford University, the “vacuum flask” was first manufactured for commercial use in 1904, when two German glass blowers formed Thermos GmbH. They held a contest to name the “vacuum flask” and a resident of Munich, Germany submitted “Thermos,” which came from the Greek word “Therme” meaning “heat.”
A vacuum flask is a bottle made of metal, glass, or plastic with hollow walls. The narrow region between the inner and outer wall is evacuated of air so it is a vacuum. Using a vacuum as an insulator avoids heat transfer by conduction or convection between the two walls. Radiative heat loss is reduced by applying a reflective coating to the surfaces such as silver.
Of course, the flask needs an opening to add or remove hot or cold liquids. Interestingly the most heat or cold loss happens at the stopper. Originally, the stopper would have been made of cork, with plastic being used later because it was more durable and could be formed in a shape to match the opening. A typical vacuum flask will keep liquid cool for about 24 hours, and warm for up to 8. Some vacuum flasks include a fitted cup, for convenience of use with drinks.
- Conduction: The transfer of heat by direct contact of particles of matter.
- Constraints: Limitations with material, time, size of team, etc.
- Convection: The transfer of thermal energy due to the movement of molecules within fluids.
- Criteria: Conditions that the design must satisfy like its overall size, etc.
- Engineers: Inventors and problem-solvers of the world. Twenty-five major specialties are recognized in engineering (see infographic).
- Engineering Design Process: Process engineers use to solve problems.
- Engineering Habits of Mind (EHM): Six unique ways that engineers think.
- Heat Transfer: Heat can transfer in three ways: conduction, convection, and radiation.
- Insulation: Used to keep cool items cool and hot items hot in a vacuum flask.
- Iteration: Test & redesign is one iteration. Repeat (multiple iterations).
- Prototype: A working model of the solution to be tested.
- Radiation: The transfer of heat energy through empty space.
- Vacuum Flask: A bottle made of metal, glass, or plastic with hollow walls. The narrow region between the inner and outer wall is evacuated of air so it is a vacuum. Using a vacuum as an insulator avoids heat transfer by conduction or convection between the two walls.
Internet Connections
Recommended Reading
- Schaum’s Outline of Heat Transfer (ISBN: 978-0070502079)
- 1001 Inventions That Changed the World (ISBN: 978-0764161360)
Writing Activity
Write an essay or a paragraph about engineering has changed the options for insulating homes over the past 200 years.
Alignment to Curriculum Frameworks
Note: Lesson plans in this series are aligned to one or more of the following sets of standards:
- U.S. Science Education Standards (http://www.nap.edu/catalog.php?record_id=4962)
- U.S. Next Generation Science Standards (http://www.nextgenscience.org/)
- International Technology Education Association’s Standards for Technological Literacy (http://www.iteea.org/TAA/PDFs/xstnd.pdf)
- U.S. National Council of Teachers of Mathematics’ Principles and Standards for School Mathematics (http://www.nctm.org/standards/content.aspx?id=16909)
- U.S. Common Core State Standards for Mathematics (http://www.corestandards.org/Math)
- Computer Science Teachers Association K-12 Computer Science Standards (http://csta.acm.org/Curriculum/sub/K12Standards.html)
National Science Education Standards Grades K-4 (ages 4-9)
CONTENT STANDARD A: Science as Inquiry
As a result of activities, all students should develop
- Abilities necessary to do scientific inquiry
CONTENT STANDARD B: Physical Science
As a result of the activities, all students should develop an understanding of
- Properties of objects and materials
- Light, heat, electricity, and magnetism
CONTENT STANDARD E: Science and Technology
As a result of activities, all students should develop
- Abilities of technological design
- Understanding about science and technology
- Abilities to distinguish between natural objects and objects made by humans
CONTENT STANDARD F: Science in Personal and Social Perspectives
As a result of activities, all students should develop understanding of
- Science and technology in local challenges
CONTENT STANDARD G: History and Nature of Science
As a result of activities, all students should develop understanding of
- Science as a human endeavor
National Science Education Standards Grades 5-8 (ages 10-14)
CONTENT STANDARD A: Science as Inquiry
As a result of activities, all students should develop
- Abilities necessary to do scientific inquiry
CONTENT STANDARD B: Physical Science
As a result of their activities, all students should develop an understanding of
- Properties and changes of properties in matter
- Transfer of energy
CONTENT STANDARD E: Science and Technology
As a result of activities in grades 5-8, all students should develop
- Abilities of technological design
- Understandings about science and technology
National Science Education Standards Grades 5-8 (ages 10-14)
CONTENT STANDARD F: Science in Personal and Social Perspectives
As a result of activities, all students should develop understanding of
- Science and technology in society
CONTENT STANDARD G: History and Nature of Science
As a result of activities, all students should develop understanding of
- History of science
National Science Education Standards Grades 9-12 (ages 14-18)
CONTENT STANDARD A: Science as Inquiry
As a result of activities, all students should develop
- Abilities necessary to do scientific inquiry
CONTENT STANDARD B: Physical Science
As a result of their activities, all students should develop understanding of
- Structure and properties of matter
- Conservation of energy and increase in disorder
- Interactions of energy and matter
CONTENT STANDARD E: Science and Technology
As a result of activities, all students should develop
- Abilities of technological design
- Understandings about science and technology
CONTENT STANDARD F: Science in Personal and Social Perspectives
As a result of activities, all students should develop understanding of
- Science and technology in local, national, and global challenges
CONTENT STANDARD G: History and Nature of Science
As a result of activities, all students should develop understanding of
- Historical perspectives
Next Generation Science Standards Grades 3-5 (Ages 8-11)
Energy
- MS-PS3-3. Apply scientific principles to design, construct, and test a device that either minimizes or maximizes thermal energy transfer.
Engineering Design
Students who demonstrate understanding can:
- 3-5-ETS1-1.Define a simple design problem reflecting a need or a want that includes specified criteria for success and constraints on materials, time, or cost.
- 3-5-ETS1-2.Generate and compare multiple possible solutions to a problem based on how well each is likely to meet the criteria and constraints of the problem.
- 3-5-ETS1-3.Plan and carry out fair tests in which variables are controlled and failure points are considered to identify aspects of a model or prototype that can be improved.
Next Generation Science Standards Grades 6-8 (Ages 11-14)
Engineering Design
Students who demonstrate understanding can:
- MS-ETS1-1 Define the criteria and constraints of a design problem with sufficient precision to ensure a successful solution, taking into account relevant scientific principles and potential impacts on people and the natural environment that may limit possible solutions.
- MS-ETS1-2 Evaluate competing design solutions using a systematic process to determine how well they meet the criteria and constraints of the problem.
Standards for Technological Literacy – All Ages
The Nature of Technology
- Standard 1: Students will develop an understanding of the characteristics and scope of technology.
- Standard 3: Students will develop an understanding of the relationships among technologies and the connections between technology and other fields of study.
Technology and Society
- Standard 4: Students will develop an understanding of the cultural, social, economic, and political effects of technology.
- Standard 5: Students will develop an understanding of the effects of technology on the environment.
- Standard 6: Students will develop an understanding of the role of society in the development and use of technology.
- Standard 7: Students will develop an understanding of the influence of technology on history.
Design
- Standard 8: Students will develop an understanding of the attributes of design.
- Standard 9: Students will develop an understanding of engineering design.
- Standard 10: Students will develop an understanding of the role of troubleshooting, research and development, invention and innovation, and experimentation in problem solving.
Abilities for a Technological World
- Standard 11: Students will develop abilities to apply the design process.

 Industrial Engineering
 Computer Engineering
Applying Technology to Solve Problems

Engineering Teamwork and Planning
You are part of a team of engineers given the challenge of building a container to keep a cup of chilled water from warming up. You’ll have lots of materials to use such as aluminum foil, plastic sheets, fabric, cotton balls, moss, cardboard, additional paper cups, tape, cups, straws, paper clips, clothes pins, wire, string, recycled packing foam, fabric, rubber bands, and other readily available materials. Your team’s challenge is to develop a device to keep chilled water cooler than other team’s devices at the end of one hour. You will need to devise a way to have a thermometer rest in the water and be able to read the temperature throughout the hour.
Research Phase
Read the materials provided to you by your teacher, including those that discuss heat transfer.
Planning and Design Phase
Think about the different ways you can use the materials provided to keep the chilled water cold. Remember that you need to leave a space for a thermometer to measure the chilled temperature at the beginning, and then one hour after your design is built. In the box below, draw a diagram of your planned insulated cup and include a list of the parts you think you might need. You can adjust this later and also add more materials during construction. Present this plan to your class.
|
|
|
Materials Needed:
|
Construction Phase
Build your insulation system around the cup with the chilled water provided to you. Remember to figure out a method for keeping a thermometer suspended in the water while still being able to read the temperature. You can make any adjustments during construction that you like, including asking for additional materials you might need. You can also trade materials with other teams if they have extra items you need.
Classroom Testing
Your teacher will chill and the pour an equal amount of cold water into each team’s device. Take temperature readings every ten minutes for one hour, and then chart your results in graph format. In the boxes below, mark your temperatures, and then complete the reflection questions.
| Original Temp of water | Temp at 10 minutes | Temp at 20 minutes | Temp at 30 minutes | Temp at 40 minutes | Temp at 50 minutes | Final Temp at 1 Hour | Difference in Temperature from original to final |
|
|
| Greatest Difference in Temperature in your classroom | Greatest Difference in Temperature in your classroom |
|
|
Reflection
Complete the reflection questions below:
- How similar was your original design to the actual insulated cup that you built? What changed? Why?
- How did your team’s temperature variance compare with the rest of the class?
- If you had a chance to do this project again, what would your team have done differently?
- What did your graph tell you about the rate of temperature changer for your device?
- If you could have used one additional component material that was not provided to you which would you choose and why?
- Did your team make use of any of the things you learned about vacuum flasks in your design? If so, how, and did you think it made a difference?
- What aspects of other team designs did you find most innovative? Why?
Downloadable Student Certificate of Completion